5 Ways To Organize Your Home With Cricut Joy
This is a sponsored post written by me on behalf of Cricut. All opinions are 100% mine.
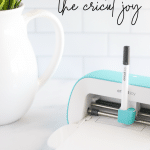
The NEW Cricut Joy is the perfect crafting tool to help organize your home! I’m proud to be partnering with Cricut to bring you this post! Allow me to introduce my newest DIY best friend, the Cricut Joy! The Cricut Joy is a a new more compact Cricut, with features that make it faster and easier to get to creating! I often brag about how I use my Cricut on a daily basis, well with the Cricut Joy, daily projects are now even simpler and quicker! 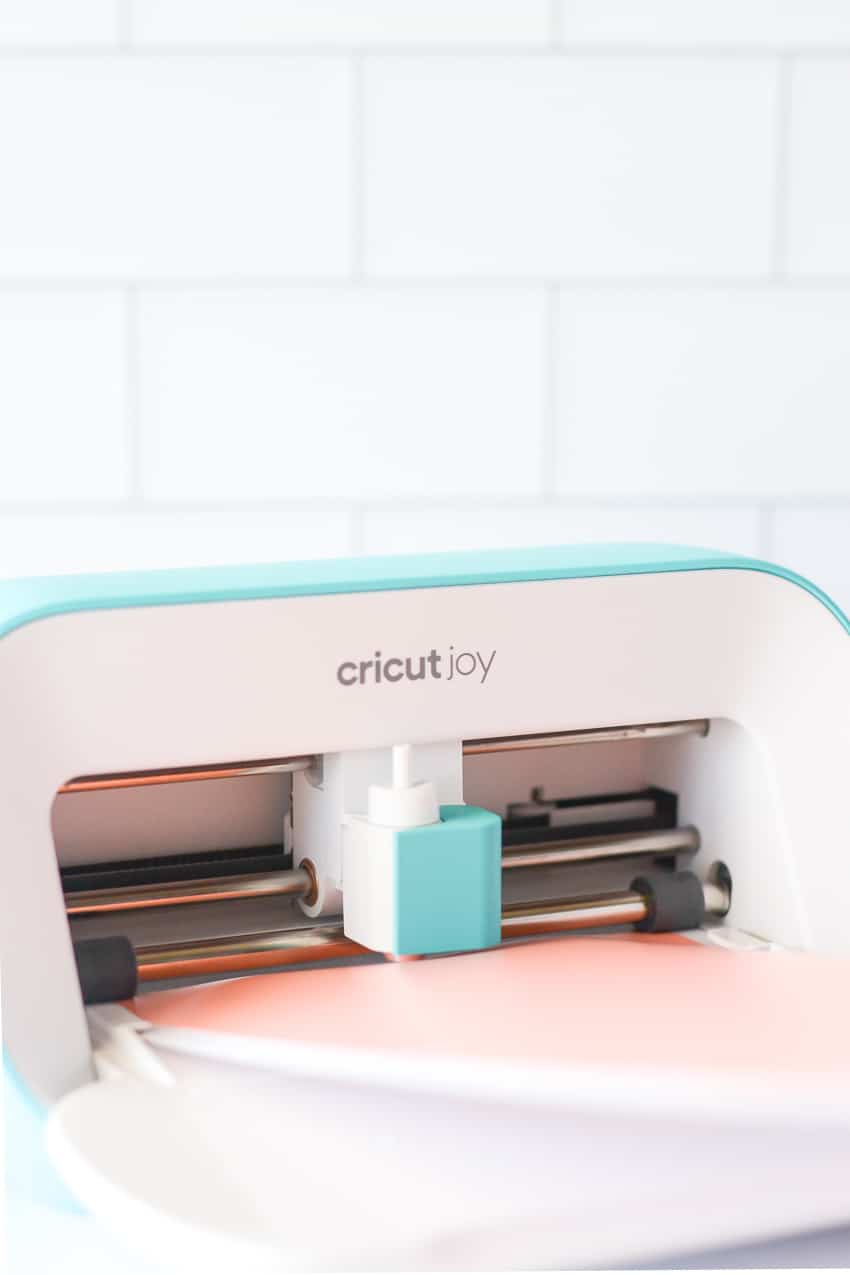 My absolute favorite feature of the Cricut Joy is the ability to create mat-free projects and long cuts, using Cricut Joy™ Smart Vinyl™, which comes in a variety of colors. Cricut Smart Vinyl rolls are available in lengths up to 20 feet! That’s a whole lotta project! Just imagine the possibilities! More often than not, I used my Cricut Explore Air 2, to create vinyl labels. While she’ll always be my go-to for larger scale projects, creating quick vinyl decals with the Cricut Joy takes a manner of minutes and can easily be done somewhere like the kitchen counter. Simply type your text into Design Space, slide a sheet of smart vinyl into the Joy, and click GO! Seriously, it’s that easy!
  Take a look as some of the super simple ideas below for how you can use the Cricut Joy to help organize your home! You can even create written labels with writable vinyl— how neat is that?!
5 Ways To Organize Your Home With Cricut Joy
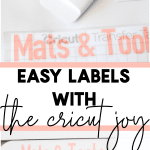
Label Craft Drawers
I have an entire set of drawers that I use to store my Cricut crafting supplies. With six drawers of materials, it’s easy to get confused as to what is stored where. My very first Cricut Joy project was to create labels for my craft materials. 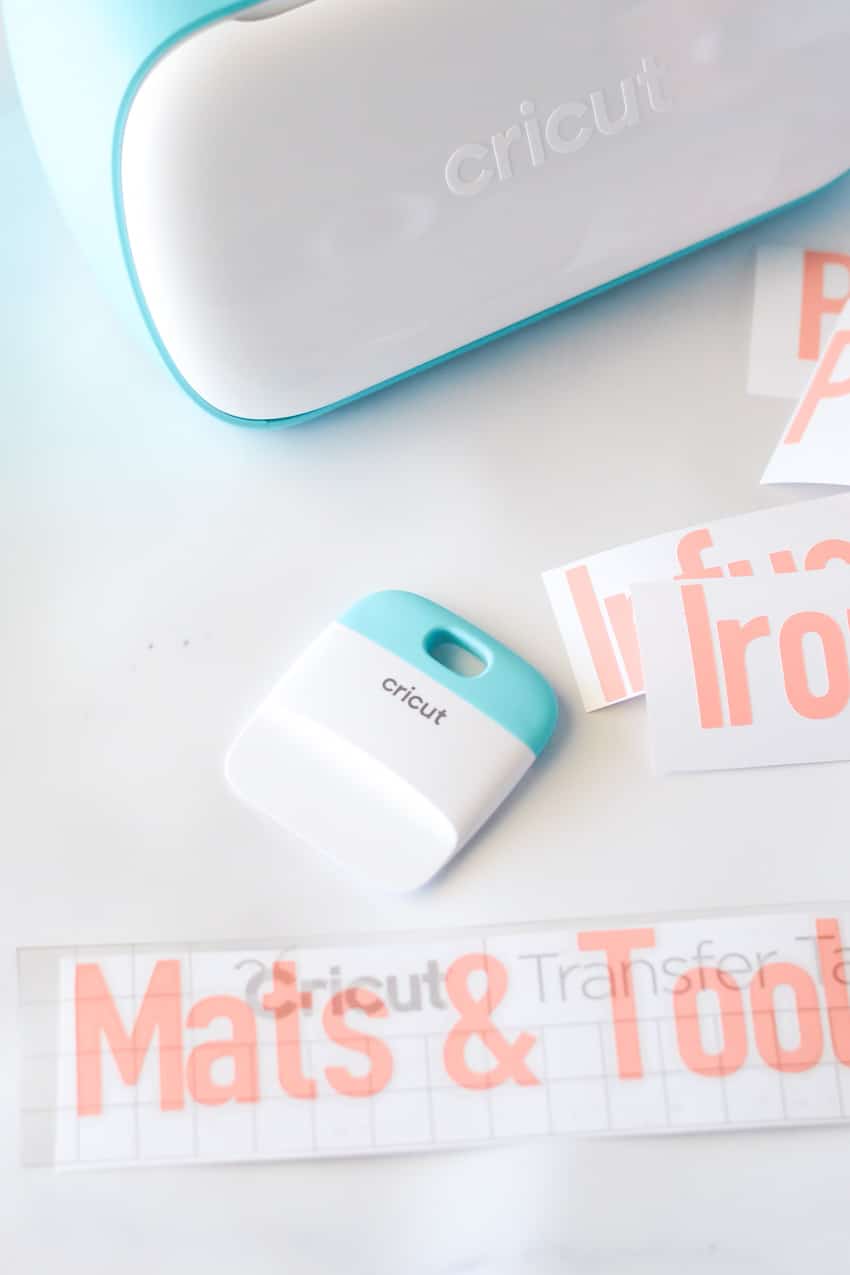 Now materials can easily be put away as they’re used and each of the drawers are neatly organized with the same material inside.
 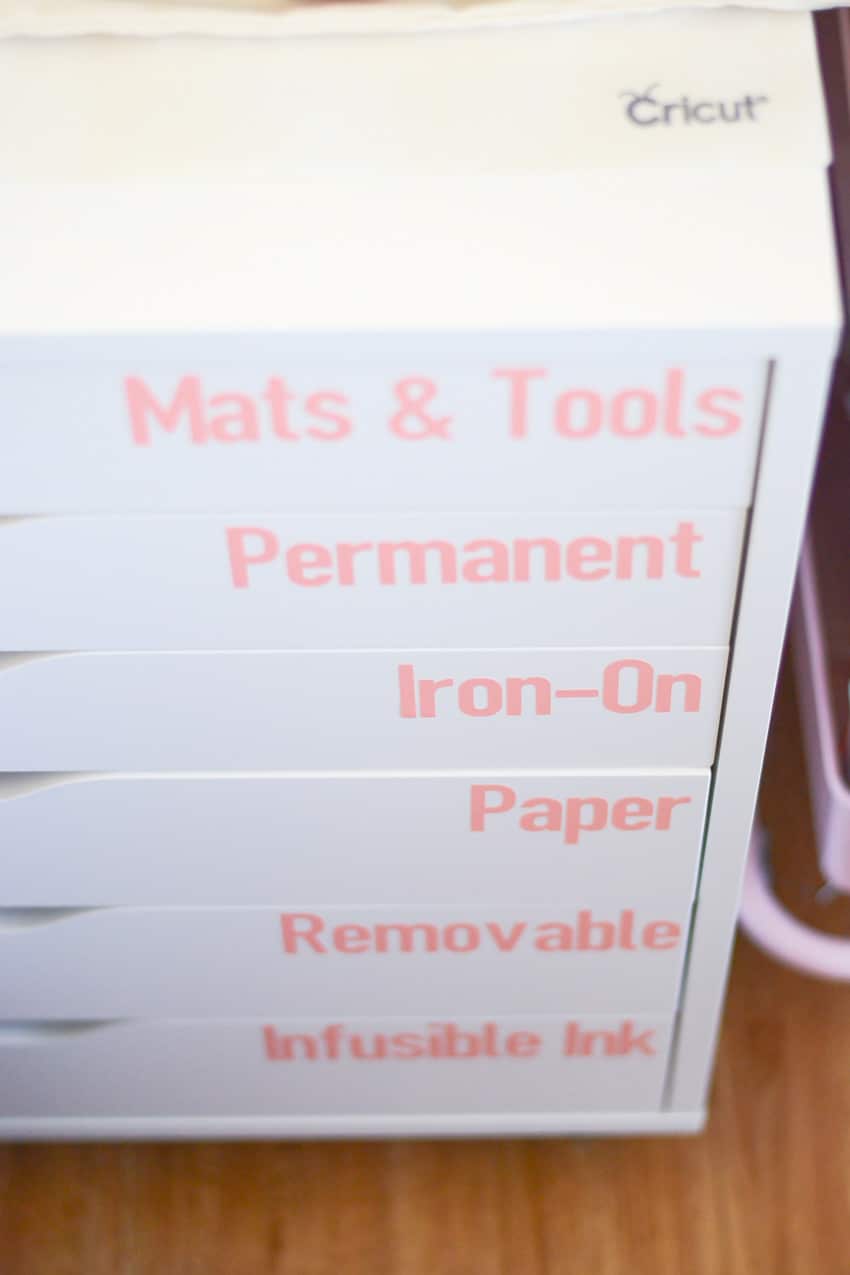 For this project, I used the font: DIN 1451 Com Eng Schrift and Cricut Joy Smart Vinyl in Coral.
 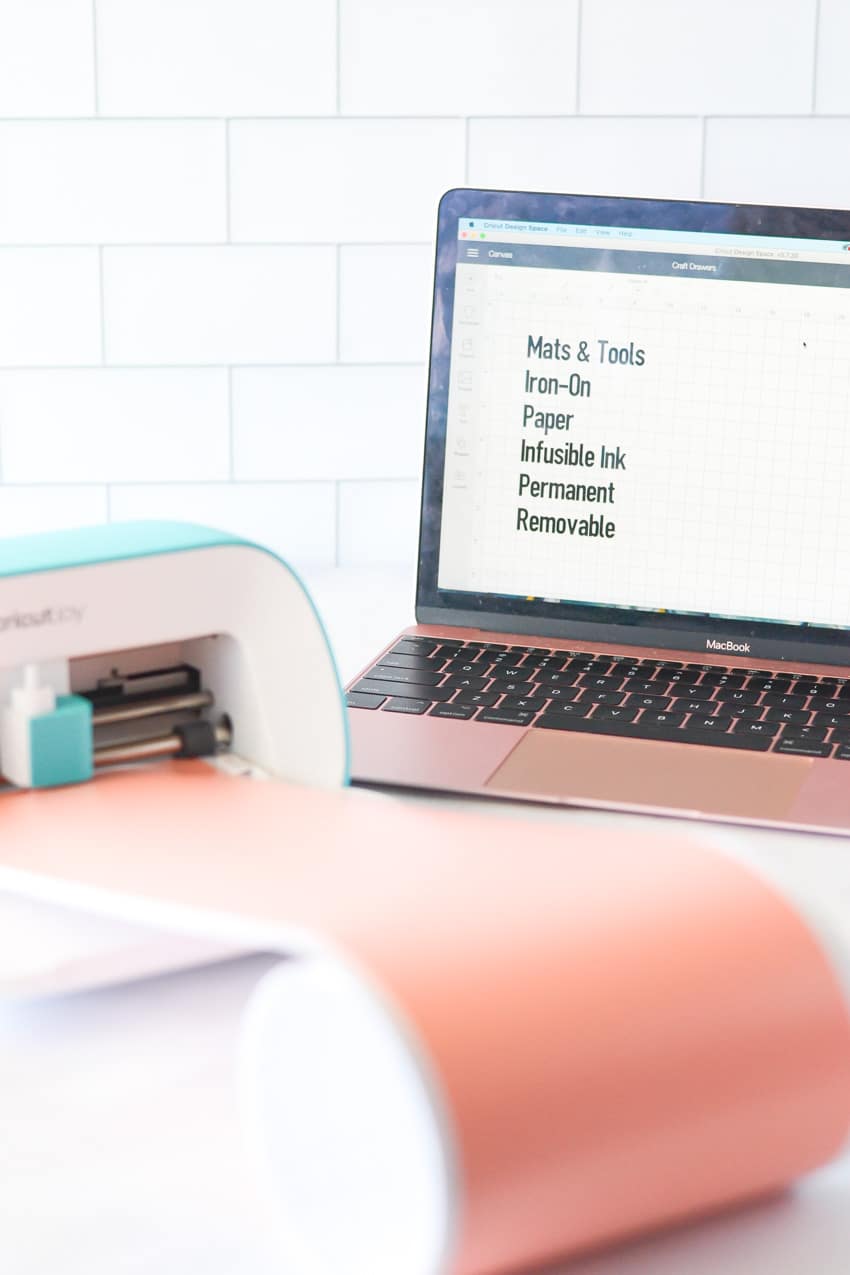 Find my Cricut Design Space canvas: HERE
Under the Sink
Use big bold text to label bins underneath the sinks in the kitchen and bathrooms. We use bins to separate items such as: paper products, cleaning products, and makeup. Plus, because our downstairs bathroom serves as our storm shelter, I even have a bin under that sink with emergency items and water.
Kid’s Dresser Drawers
One of the most frustrating obstacles our household faces is laundry and getting it all put away. I swear, it feels like there is never an end to piles of dirty AND clean clothes. Having the kids help by putting away their items can be helpful, except for when they just throw it into which ever drawer. Also not helpful when it comes time to get dressed and they “have nothing to wear.” 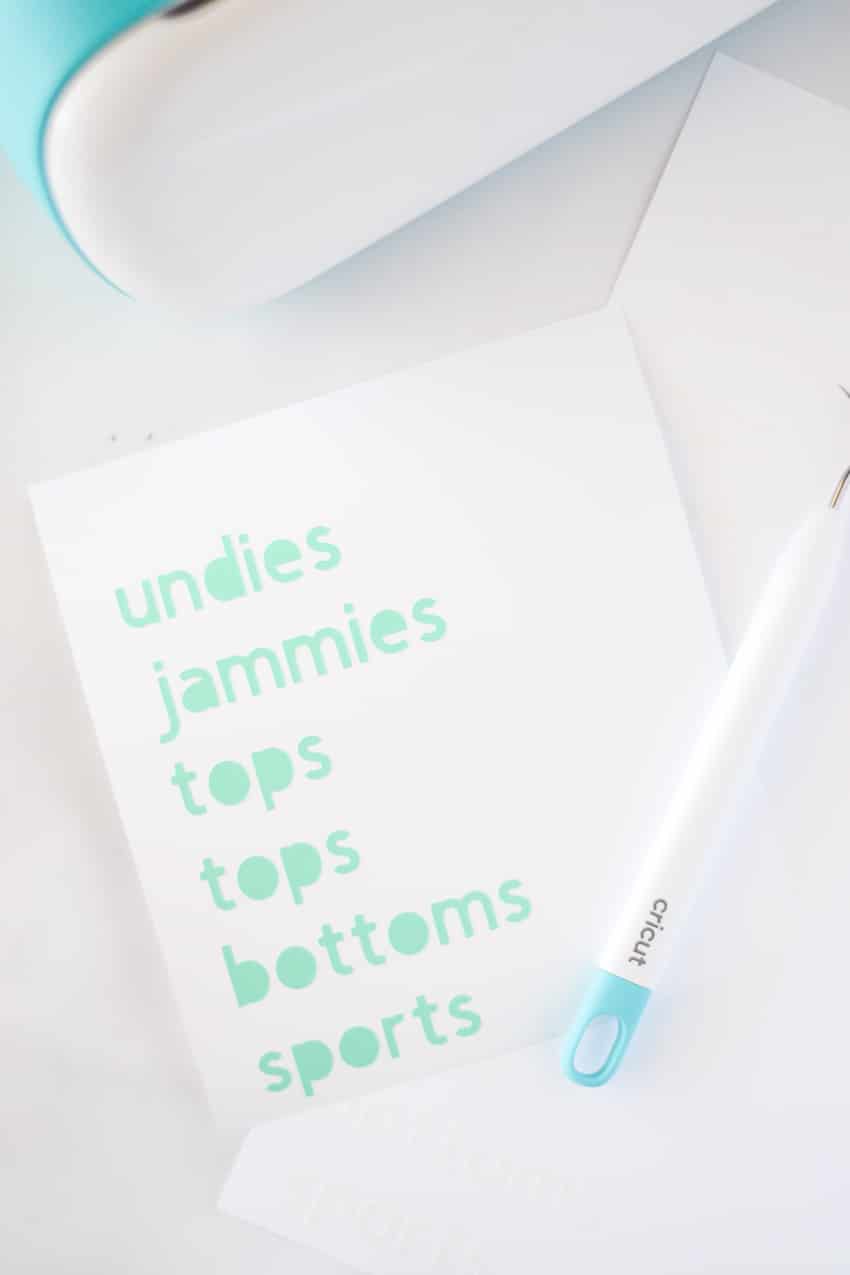 I finally labeled the lips of the girls dresser drawers to ensure that clothes was getting put away in the appropriate places. As a result, the clothes gets put away plus, the girls are easily able to find it. Win-win!
 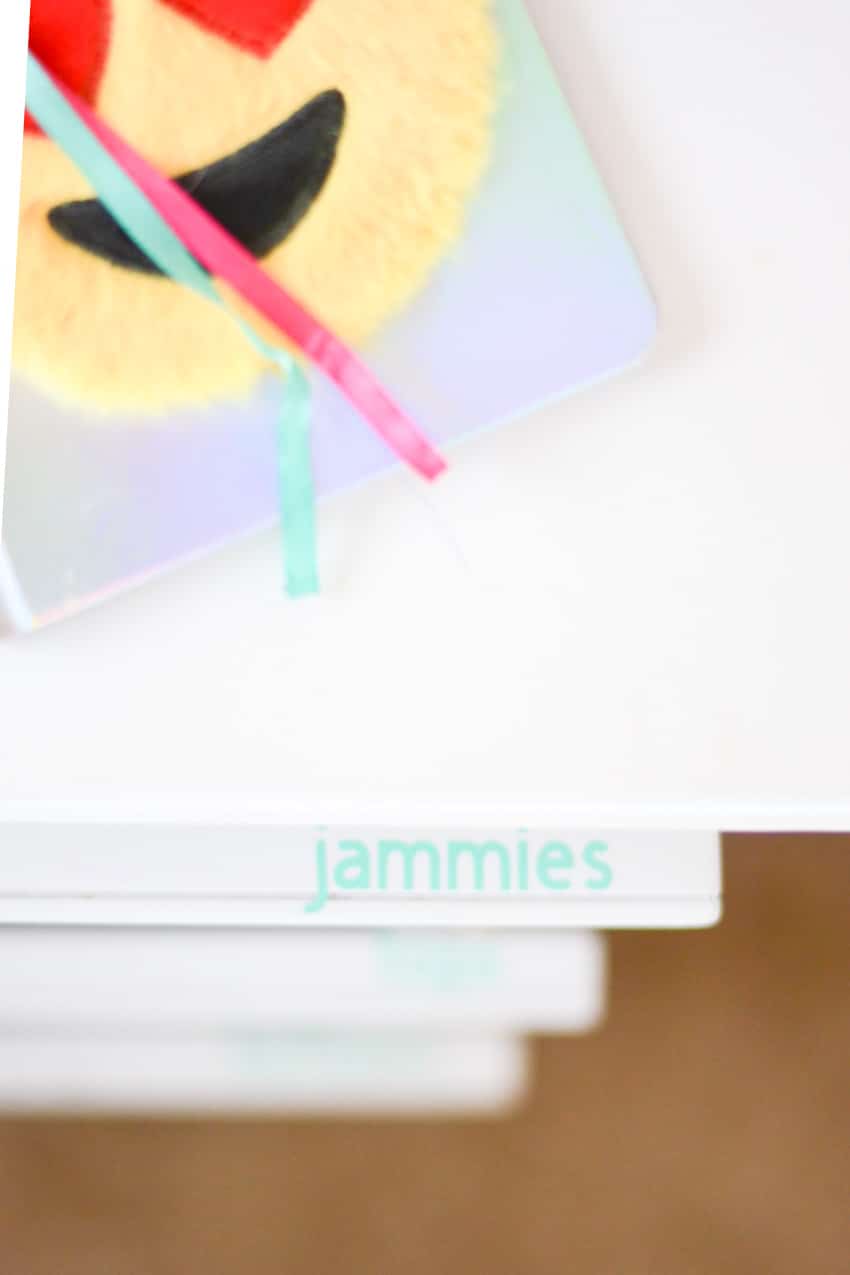 Best of all, since the label is on the top lip of the drawer, they’re not embarrassed when friends come over and see “undies.” Ha! Find my Cricut Design Space canvas: HERE
School Work Bins
Now that school is done for the year, it’s time to organize all that classwork that came home! First, go through the stacks of paper and toss anything that isn’t worth keeping. I keep a bin for each child that hold hanging folders inside. Each folder corresponds to a school year, starting at 3K. Create labels for each grade level folder, as well as for the exterior of each bin.
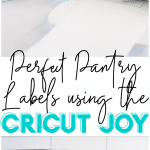
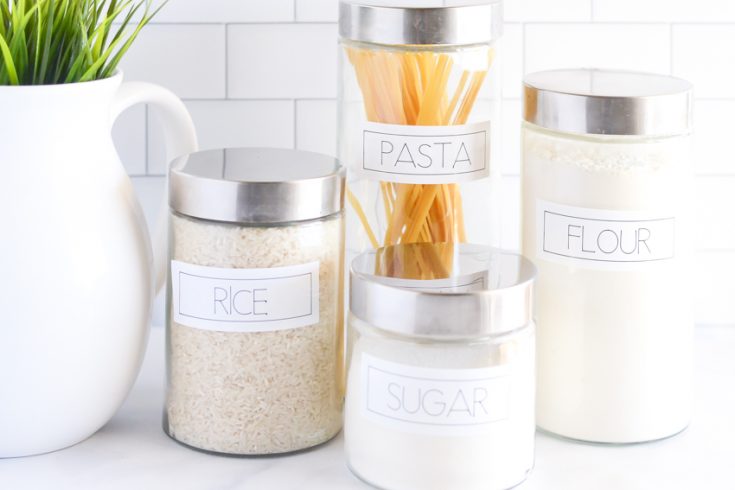
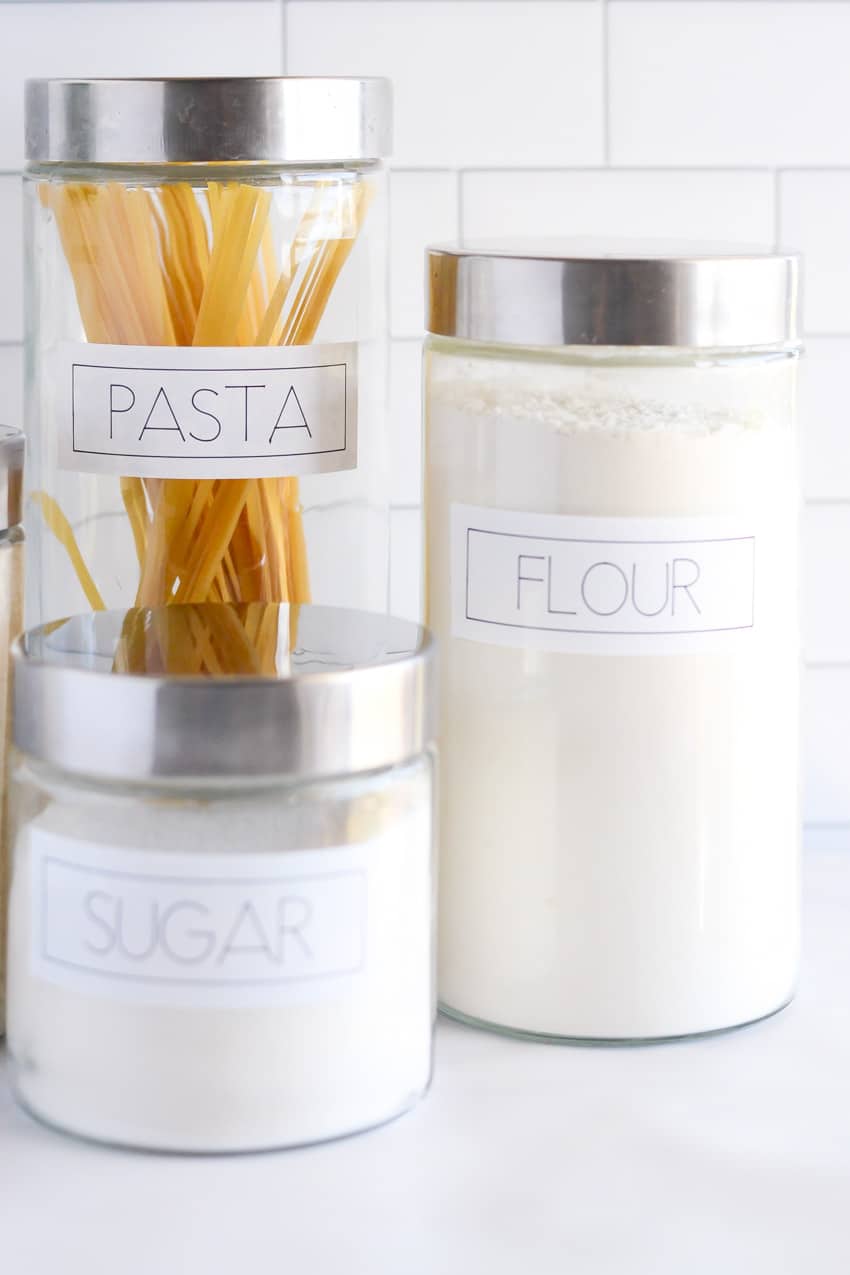
Pantry Labels
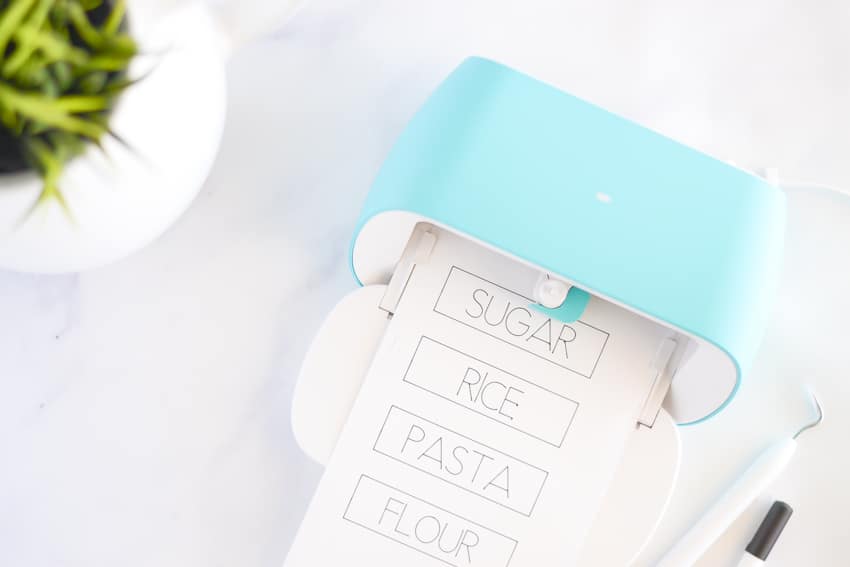
Using Smart Label Writable Vinyl along with a Cricut Joy Fine Point pen is probably the EASIEST method for creating organizational labels! Use the Joy to neatly write out your text AND precisely cut out labels for sticking to containers. Using this method does not require transfer tape and allows for each label to be placed by hand. 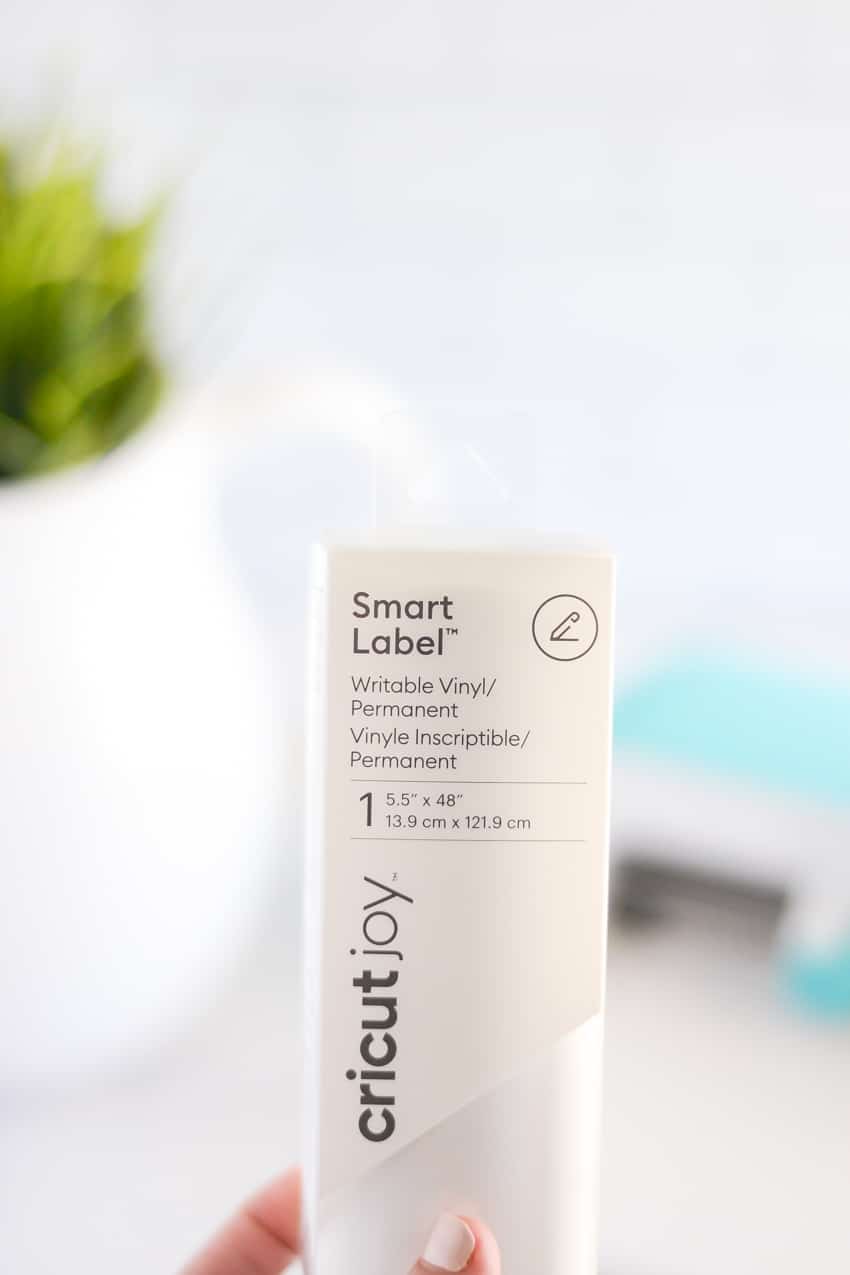 Take a look at the how-to card below for step by step instructions for creating your own pantry labels. I made mine using rectangle shapes, but you could just as easily make circle labels following these same instructions!
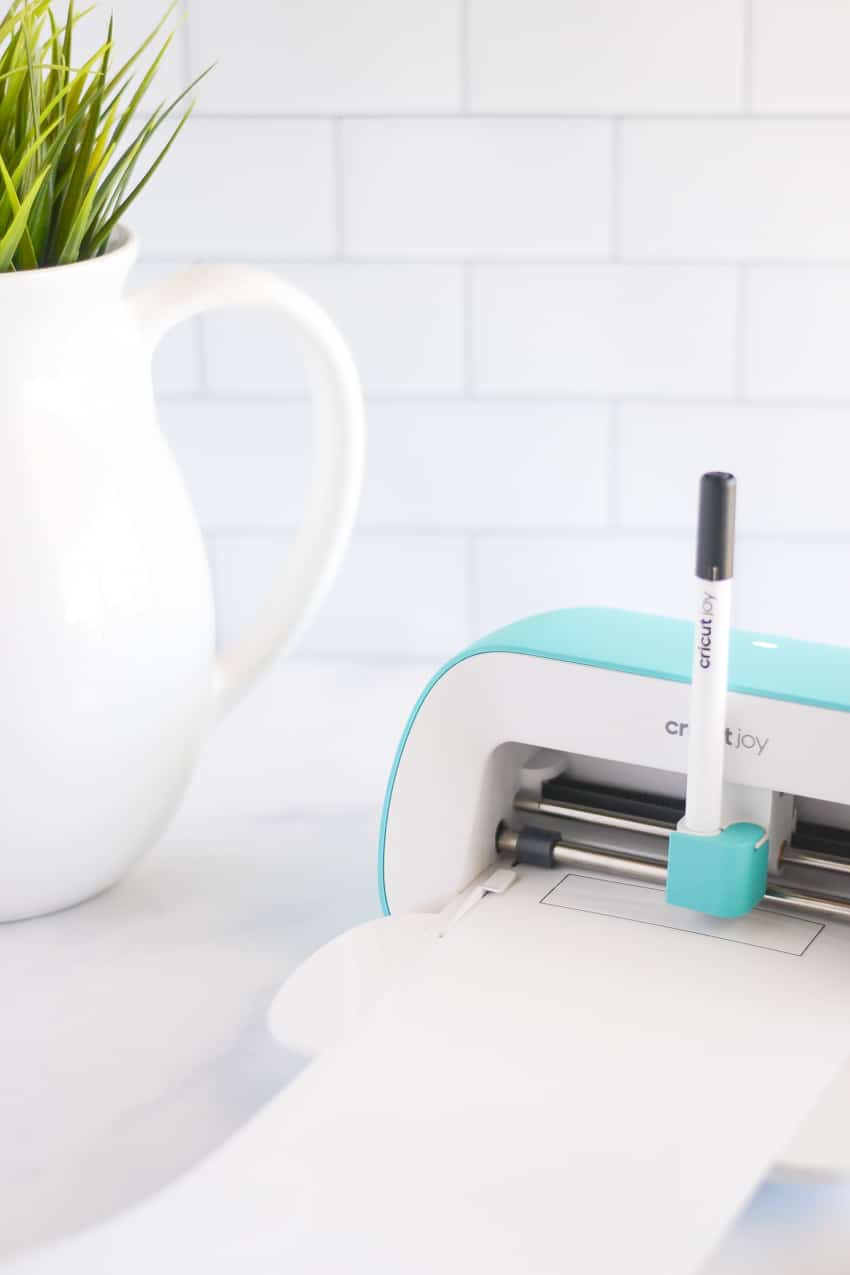
 You can also find my Design Space canvas: HERE
5 Ways To Organize Your Home With Cricut Joy
Organize your kitchen and pantry with simple labels easily created with a Cricut Joy and writable vinyl.
Materials
- Cricut Joy™ Smart Label™ Writable Vinyl
Tools
- Cricut Joy
- Cricut Joy Fine Point Pen
Instructions
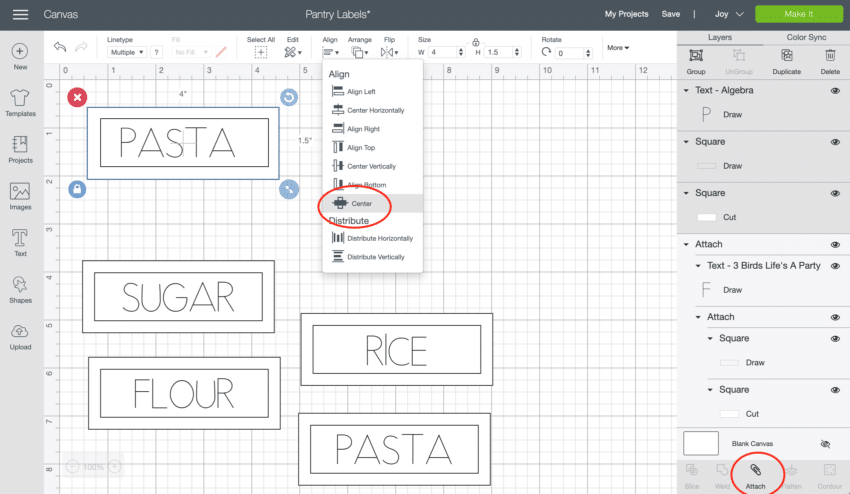
- Open Cricut Design Space to design pantry labels. Start by inserting a square shape and adjusting the size to 4x1.5 inches. Change the color to white and ensure that "cut" is selected for the linetype.
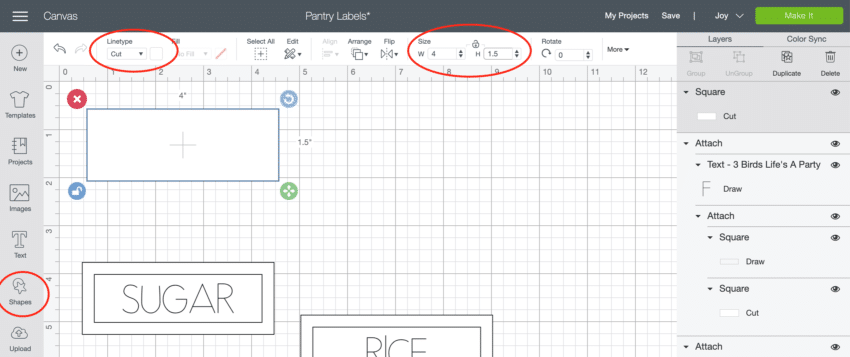
- Insert a second square, sized 3.5x1 inches. Change the linetype for the second rectangle to "draw" and the color to "Fine Point Pen (0.4mm) - Black."
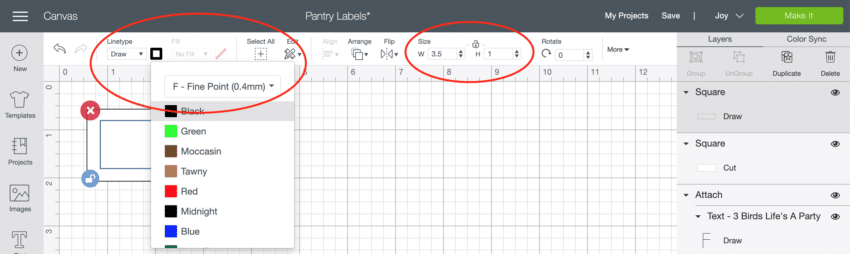
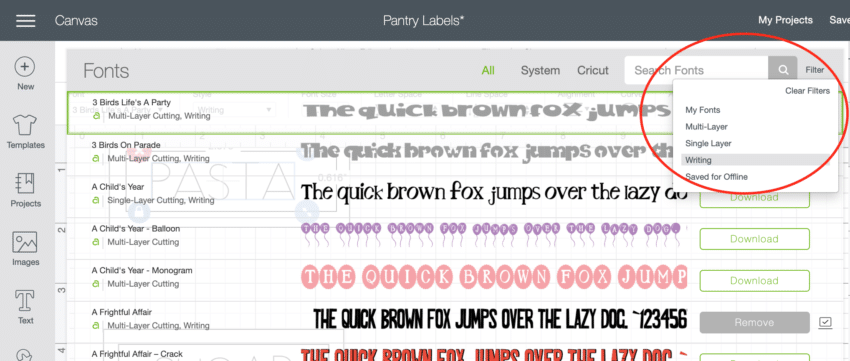
- Next, insert a text box, and use the text filter to select a "writing" font. For this project I used the font: Algebra. Size the text to fit within both rectangles, and ensure that "draw" and and the color to "Fine Point Pen (0.4mm) - Black are selected for the linetype.
- Finally, select both rectangles and text (you can drag our cursor around them to select all) and choose "center" under the align tab. While all three elements are still selected, use the attach button to attach them.
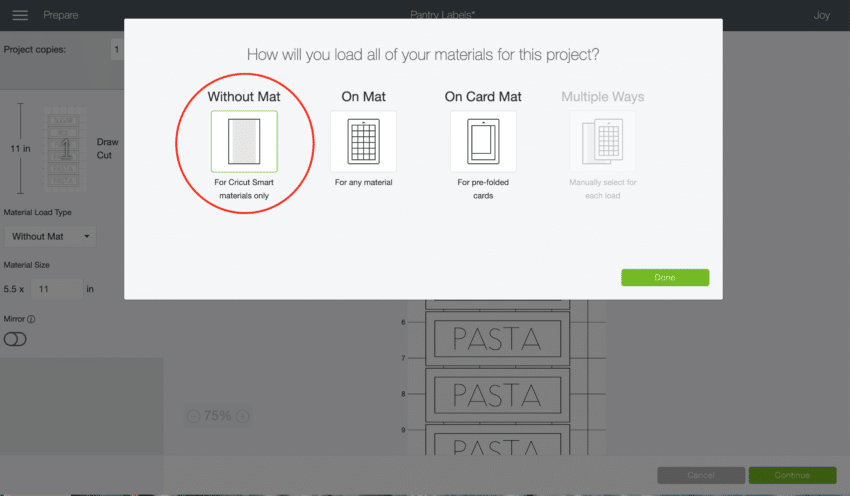
- Repeat these steps OR duplicate the rectangles and text to create as many labels as desired. Ensure that each label is attached to itself, before clicking "Make It."
- To cut these labels using Cricut Joy™ Smart Label™ Writable Vinyl, select the "Without Mat" setting. Connect your Cricut Joy via BlueTooth, insert the Fine Point Pen (if required by the on-screen prompts), insert Cricut Joy™ Smart Label™ Writable Vinyl, and click GO.
- When the labels have finished cutting, unload the the Smart Label vinyl and apply labels to clean pantry containers.
 With it’s compact size and super easy to use mat-free cutting, the Cricut Joy is an essential tool for organization and creating labels mat-free! Be sure to visit Cricut.com to shop and learn more!