How to Use Puff Heat Transfer Vinyl

TeckWrap sent me a box of iron-on heat transfer vinyl a few weeks ago, and I’ve been having so much fun using it! Included in the package, was their Puff Heat Transfer Vinyl *affiliate link – this post contains affiliate links which earn me a tiny commission at no additional cost to you.
Welcome to the world of puff-tastic creativity! If you’re looking to add some texture and dimension to your DIY projects, then you’re in for a treat with puff heat transfer vinyl. This bubbly and fun vinyl material is perfect for creating eye-catching designs that will make you stand out from the crowd. Dive into the wonderful world of puff HTV and learn how to use it to create plush and playful designs. So, let’s get ready to puff up our creativity and have a blast with this versatile material!
What is Puff Heat Transfer Vinyl?
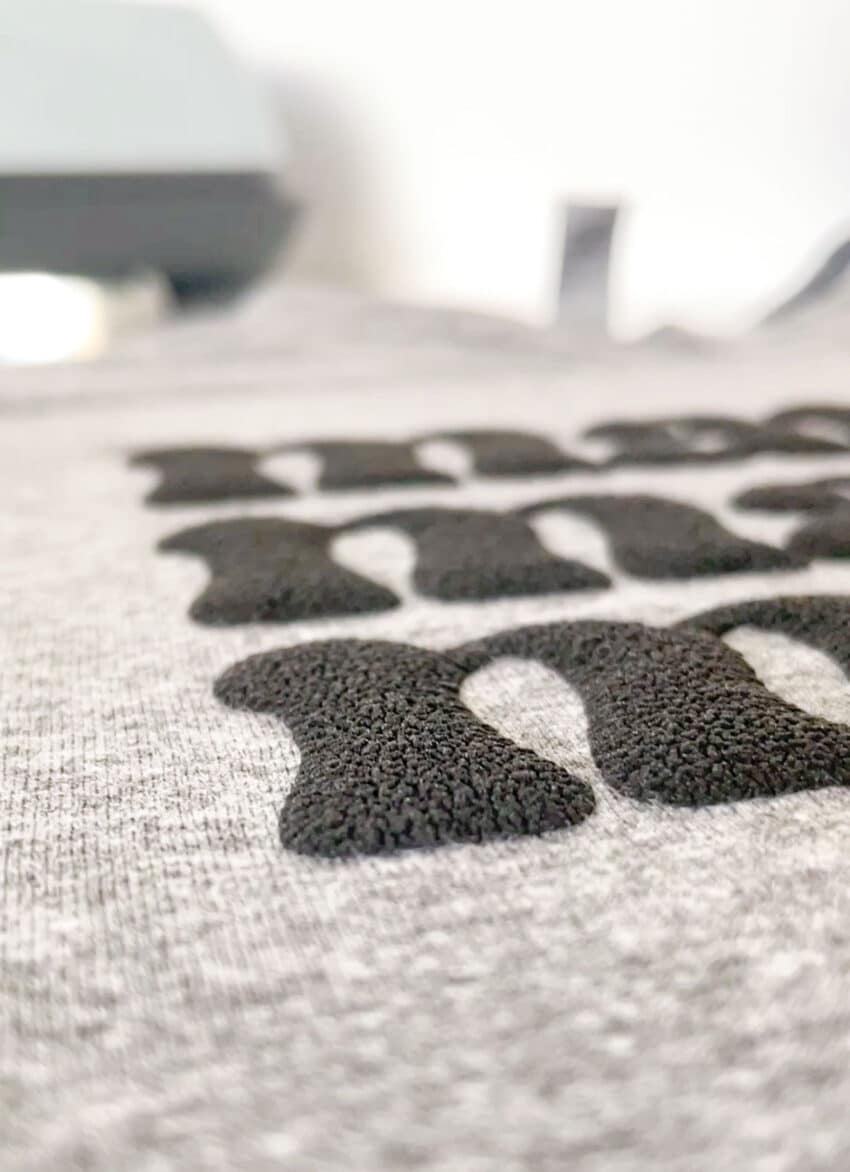
Puff Heat Transfer Vinyl, also known as Puff HTV, is a type of vinyl material that expands when heated, creating a puffy, raised effect. It’s made of a special foam-like material that puffs up when exposed to heat, resulting in a soft, plush finish. It almost looks like a professionally done t-shirt! Puff HTV comes in a wide variety of colors, making it perfect for adding depth and interest to any design.
How to Use Puff Heat Transfer Vinyl
Using Puff HTV is so simple and fun! Follow these simple steps to create your own custom shirts and other iron-on items:
You’ll need the following materials:
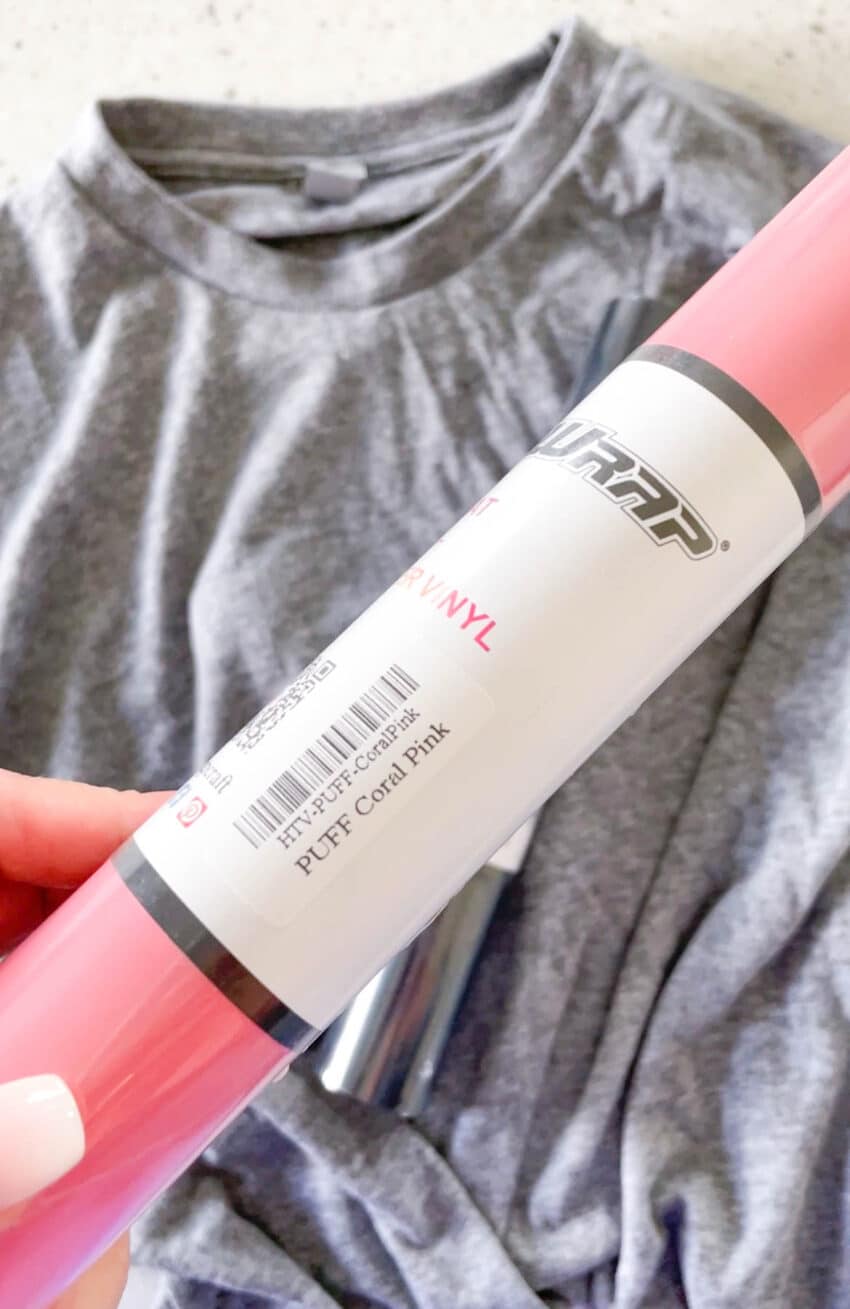
- Puff Heat Transfer Vinyl: Choose the color(s) that you’d like to use for your project. TeckWrap has a variety of colors to suit any project.
- Cutting Machine: A cutting machine, such as a Cricut or Silhouette, will make cutting your design a breeze. Make sure to adjust the settings on your machine to match the specifications of the Puff HTV you’re using. I use the regular iron-on vinyl setting.
- Weeding Tools: Weeding tools, such as a weeding pick or tweezers, are used to remove the excess vinyl from your design.
- Heat Press: You’ll need a heat press to apply heat and activate the puffing effect of the vinyl. I don’t recommend using a vinyl since they don’t heat evenly and it’s difficult to measure the exact temperature output.
- Garment or Surface to Apply Vinyl: Choose a blank t-shirt, sweater, tote bag, or any other surface you want to apply the Puff HTV to.
Create Your Design
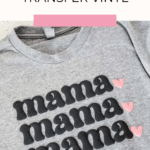
Using Design Space or the software that comes with your cutting machine, create your design. To make the Mama Shirt for Mother’s Day, you can click right over to: my design.
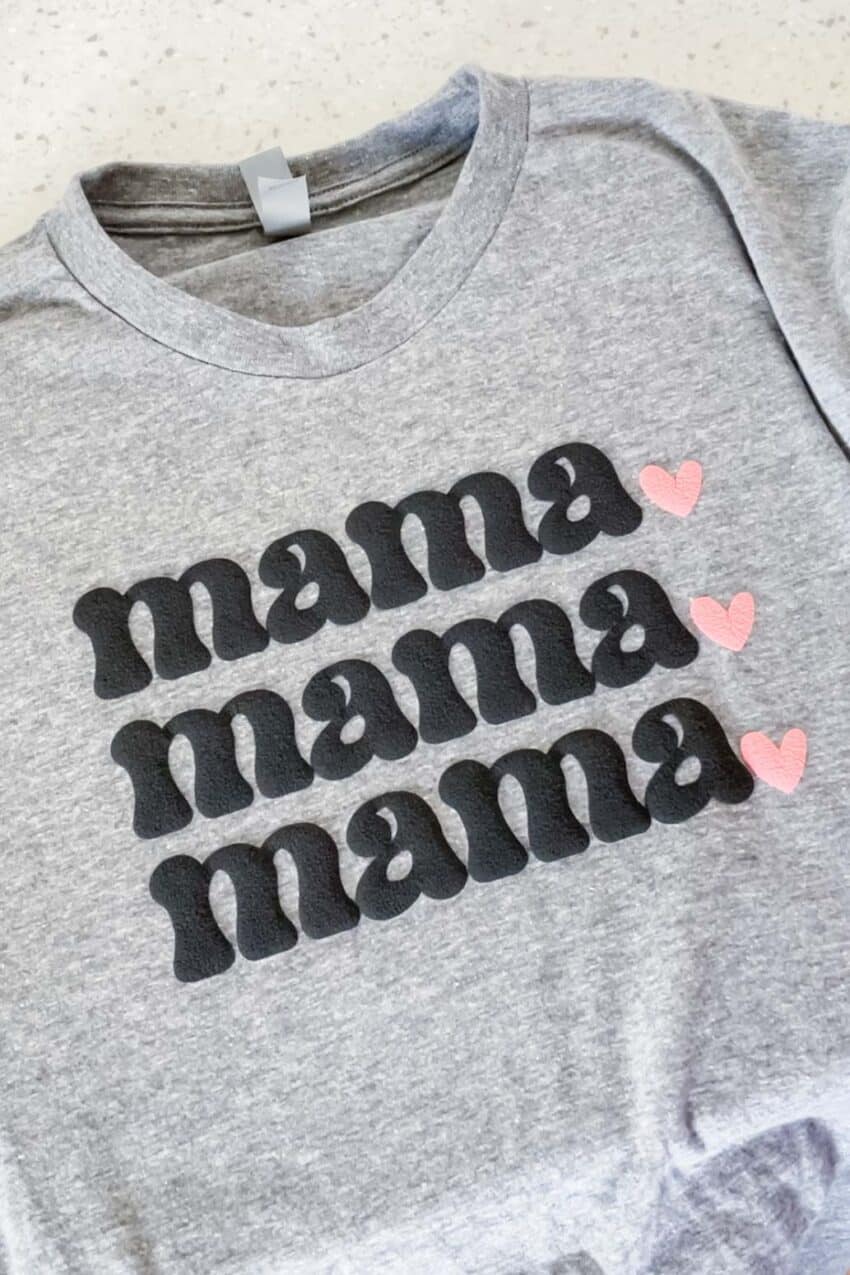
Keep in mind that Puff HTV expands when heated, so be sure to adjust your design accordingly. Avoid small, intricate details as they may get lost in the puffing effect or may not adhere well.
Cut and Weed Your Design
Load the Puff HTV into your cutting machine and cut your design according to the manufacturer’s instructions. The TeckWrap HTV that I used needs to be mirrored, then cut with the shiny side facing the mat. The Cricut’s iron-on vinyl cut setting worked perfectly.
Once the cutting is complete, carefully weed away the excess vinyl, leaving only your design on the carrier sheet. Take your time and be patient to avoid any mistakes.
Cut Puff HTV using Cricut Design Space’s: iron-on vinyl setting
Apply Your Design
Place your garment or surface on the heat press or pressing mat and preheat for just a few seconds to smooth the surface and remove any moisture. Place the cut design on your garment or surface with the carrier sheet facing up. If possible, apply all layers, to avoid having to press more than once. Just make that carrier sheets and vinyl aren’t overlapping.
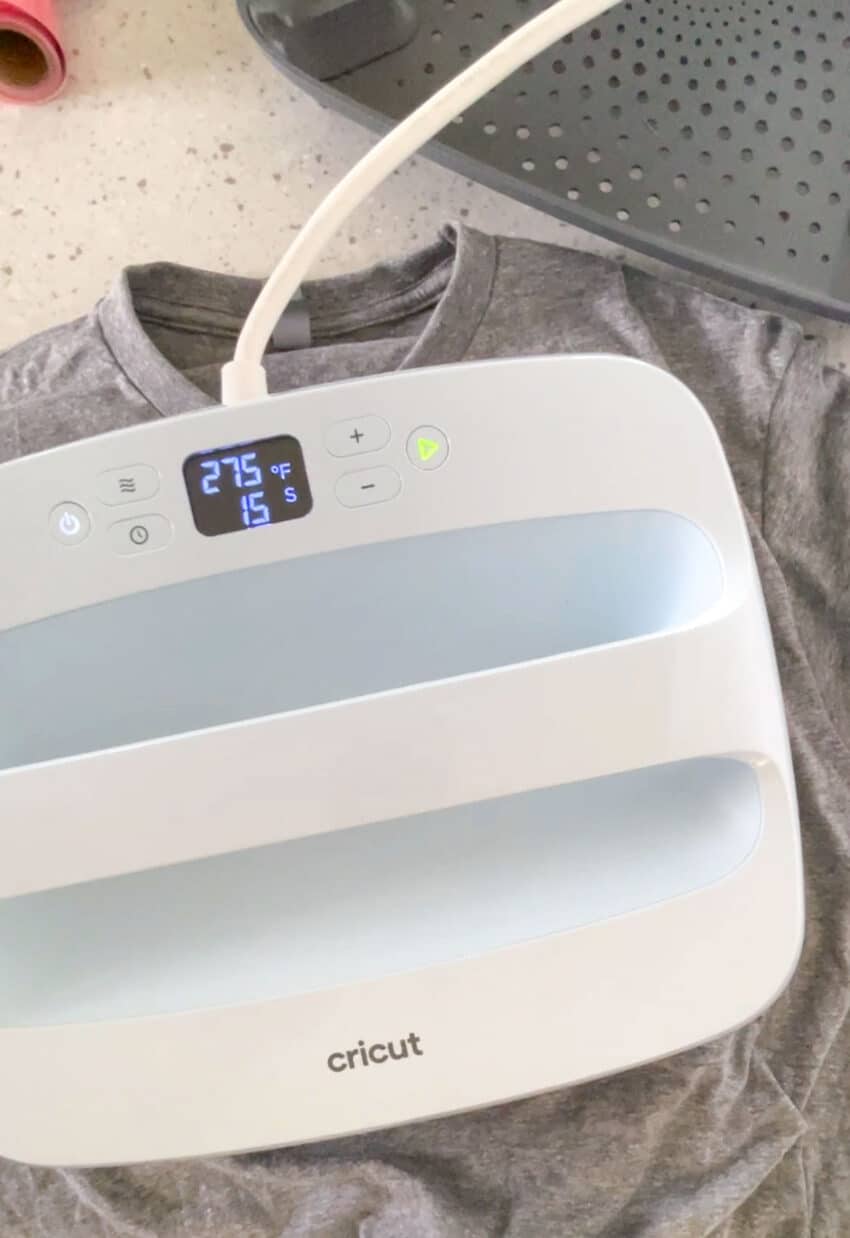
After tons of experimenting, I learned that the key to getting a successful “puff” is to use a lower temperature when pressing, and firm consistent pressure. For Puff heat transfer vinyl I set my Cricut Easy Press to 275º F for 15 seconds. If the temperature is too hot, the design will crinkle and curl.
Apply Puff HTV with heat press set to: 275º F for 15 seconds with firm pressure
Peel and Enjoy!
In my experience the clear carrier sheet more or less comes off on it’s own as the vinyl begins to puff up.
Want to learn how to use Flocked Heat Transfer Vinyl? <– Click the link to learn more!