How to Make an Infinity Card with Cricut
These infinity cards are quickly becoming one of my favorite things to craft! They look complicated, but once you start folding and decorating, they are surprisingly easy to put together.
If you have never seen one before, an infinity card is an interactive card that continues opening to reveal four different sections. It is also sometimes called a never-ending card or endless card. You can flip through it over and over, revealing new paper patterns, photos, messages, and embellishments each time.
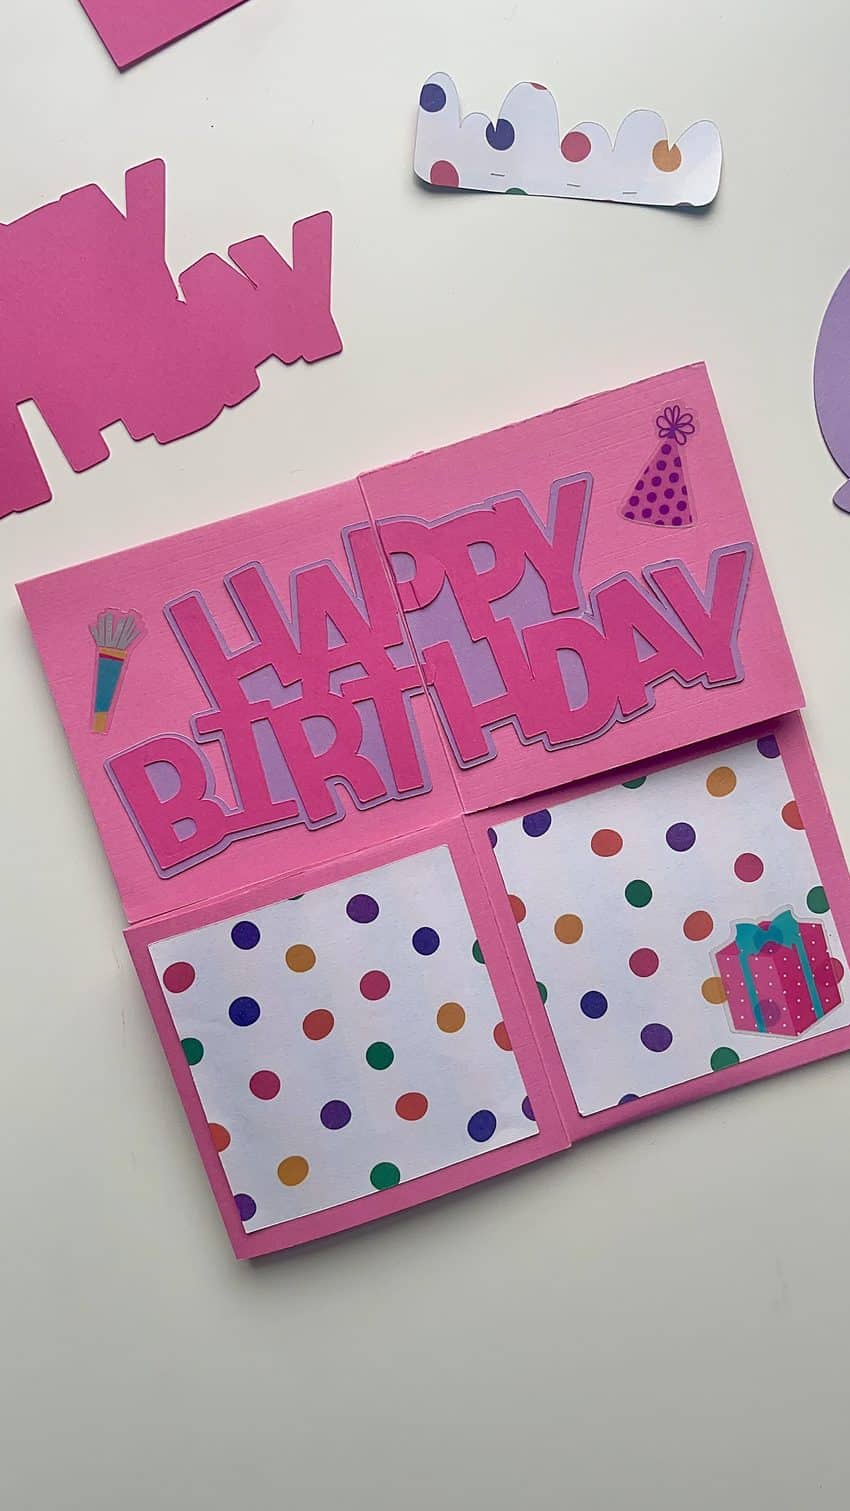
For this version, I made a colorful birthday infinity card using pink, purple, polka dot, and holographic cardstock. I finished it with a few birthday stickers, and I love how bright and fun it turned out!
Even better, I created a free Cricut Design Space template that you can use to make your own.
Watch the Birthday Infinity Card Tutorial
The easiest way to understand how an infinity card folds is to see it in action, so you can watch my complete video tutorial below.
@threelittleferns How stinkin’ cute is this infinity card?! Ready to celebrate the birthday girl this weekend! 🎉 #cricutprojects #crafttok #cardmaking #cricutmade @Cricut ♬ As It Was (Instrumental) – KPH
Once you see how the card flips through each section, the assembly process makes so much more sense!
Birthday Infinity Card Supplies
Here is what I used to make my birthday card:
- Cricut cutting machine
- LightGrip or StandardGrip cutting mat
- Free infinity card template in Cricut Design Space
- Pink cardstock
- Purple cardstock
- Polka dot cardstock
- Holographic cardstock
- Tape runner
- Birthday-themed stickers
- Cricut scoring stylus or scoring wheel, if available
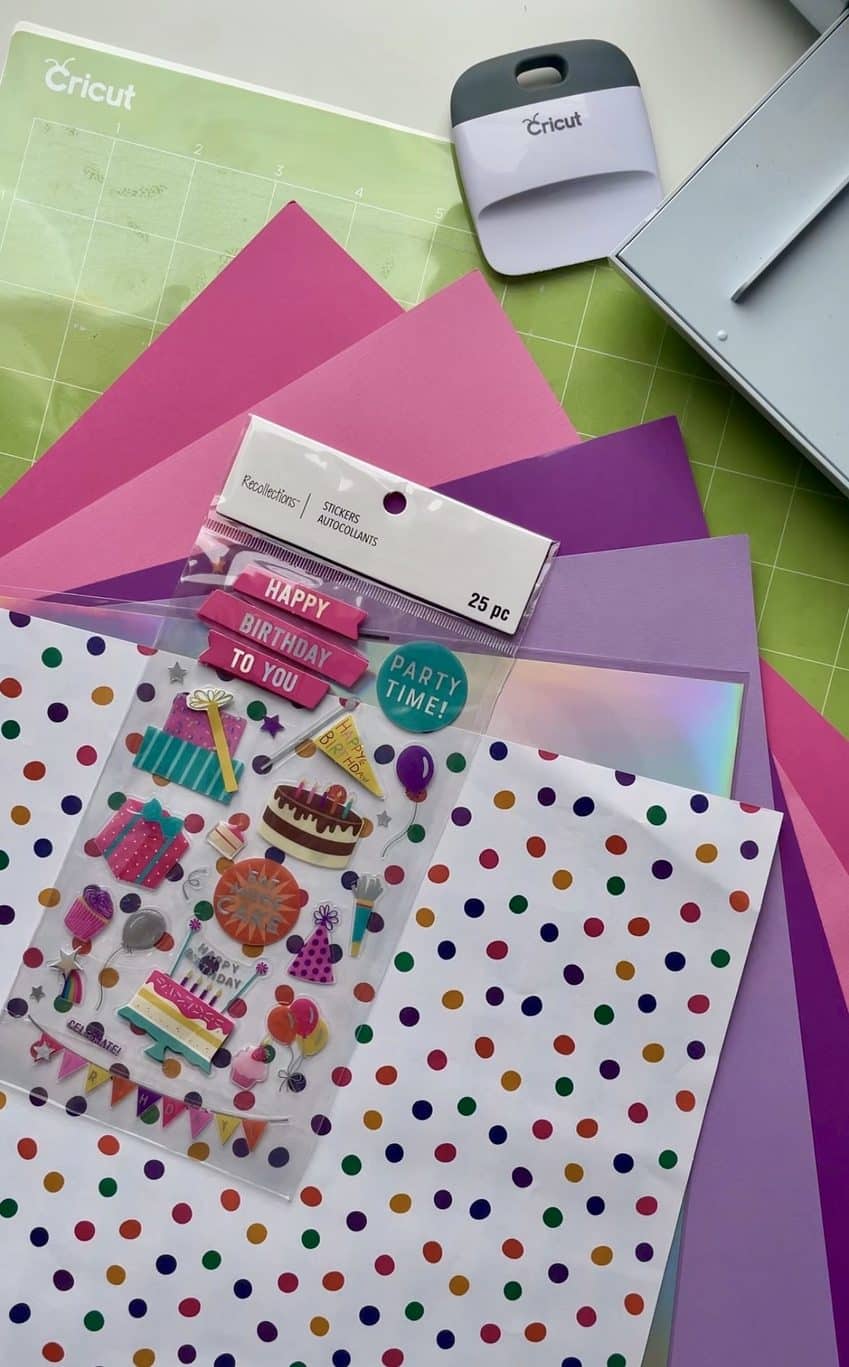
You can easily change the colors and decorations to make this card fit any occasion. Just try to keep your embellishments fairly flat so the finished card can continue flipping smoothly.
What Size Is the Finished Infinity Card?
The full sheet of cardstock is cut to 11.5 by 11.5 inches. Once folded, the infinity card measures approximately 5.75 by 5.75 inches.
The finished card is a little larger than a traditional greeting card, which gives you plenty of room to decorate each section. If you plan to mail it, keep in mind that you may need a larger envelope and additional postage, especially if you use heavier cardstock or several embellishments.
Step 1: Open the Free Infinity Card Template
Start by opening my free infinity card template in Cricut Design Space.
I created the template using completely free Design Space elements, so you do not need a Cricut Access subscription to make it.
Open the project and follow the prompts in Design Space to cut the card base and decorative pieces.
If you do not have a Cricut scoring tool, you can still make the card. You will just need to carefully fold the cardstock along the indicated lines by hand.
Step 2: Cut and Score the Cardstock
Place your cardstock on your Cricut mat and follow the Design Space prompts to cut and score the pieces.
I used a combination of pink, purple, polka dot, and holographic cardstock for my birthday card. The different colors and finishes made each new section feel like another little surprise.
Medium-weight cardstock works well for the card base. You want something sturdy enough to hold its shape, but not so thick that it becomes difficult to fold repeatedly.
When removing the cardstock, turn the mat over and gently bend the mat away from the paper. This helps prevent the cardstock from curling.
Step 3: Fold Along the Score Lines
Fold the cardstock along each score line and press the creases firmly.
I recommend folding each crease in both directions before assembling the card. This loosens the cardstock and makes the finished infinity card much easier to flip.
Do not skip this part! Well-creased folds make a huge difference in how smoothly the card moves.
Step 4: Assemble the Infinity Card
Use a tape runner to attach the pieces together, applying adhesive only to the necessary corner sections. Apply adhesive to the top left and bottom right corners, then fold from the sides into the middle. Then, apply adhesive to the top right, and bottom left corners, and fold them from the top and bottom into the middle.
Avoid putting adhesive across any of the center folds. If those areas are glued down, the card will not be able to open and flip properly.
Take your time lining up the edges before pressing everything into place. The more evenly the pieces are aligned, the better the finished card will move.
Once the base is assembled, gently flip through all four sections. It may feel a little stiff at first, but it should loosen up after you fold through it a few times.
Step 5: Plan the Decorations
Now for my favorite part!
Before attaching the decorative cardstock, flip through the entire card and place the pieces where you think you want them. For my birthday infinity card, I alternated pink, purple, polka dot, and holographic cardstock. The holographic paper added the perfect amount of birthday sparkle without needing a lot of extra decorations.
Move everything around until the colors feel balanced, then use your tape runner to attach the cardstock panels.
Step 6: Add Birthday Stickers and Messages
Once the cardstock is in place, add your birthday-themed stickers, messages, or other embellishments.
Be careful not to place anything directly across the fold lines. Even a thin sticker can catch while you are opening the card if it overlaps a crease.
You can also personalize the card by adding:
- A handwritten birthday message
- Small printed photos
- Favorite memories
- Birthday wishes from family members
Just remember that flatter decorations will help the card fold more smoothly.
Step 7: Test the Finished Card
After everything is attached, gently flip through the card several times.
Make sure:
- Each section opens smoothly
- None of the decorations overlap the folds
- All of the cardstock pieces are securely attached
- The designs look complete in every position
- The finished card folds flat
If the card catches somewhere, check the fold lines for a piece of paper or sticker that may be extending too far.
More Infinity Card Ideas
Once you make your first infinity card, you can use the same Cricut template for so many different occasions.
Try making an infinity card for:
- Birthdays
- Anniversaries
- Valentine’s Day
- Mother’s Day or Father’s Day
- Christmas
- Graduations
- Baby announcements
- Teacher appreciation
- Invitations
- Mini scrapbooks
- Photo gifts for grandparents
You could even have your children decorate the individual sections with drawings and messages for an extra-personal handmade gift.
Tips for Making an Infinity Card with Cricut
Fold every crease in both directions
This helps the cardstock move more easily and prevents the card from feeling stiff.
Keep the decorations flat
Thick embellishments can prevent the card from folding properly. Cardstock, stickers, and other flat decorations work best.
Avoid covering the fold lines
Leave a little space around each crease so nothing catches when the card opens.
Use a strong tape runner
The corners of the card do most of the work, so you want an adhesive that will hold up to repeated folding.
Test the base before decorating
Flip through the assembled card a few times before adding your decorative paper. This makes it easier to spot and fix any alignment problems.
Get the Free Cricut Infinity Card Template
Ready to make your own? You can open my free infinity card template in Cricut Design Space here:
This birthday infinity card was so much fun to decorate, and I already have ideas for several more versions. Once you make one, it is very easy to see why they are also called never-ending cards. You may not want to stop flipping through it!
If you make your own infinity card, I would love to see how you decorate it. Tag me on TikTok so I can check it out!
Now I just need to decide which occasion I should make one for next.